Once again I want to remind you about the importance of posture for facial beauty:
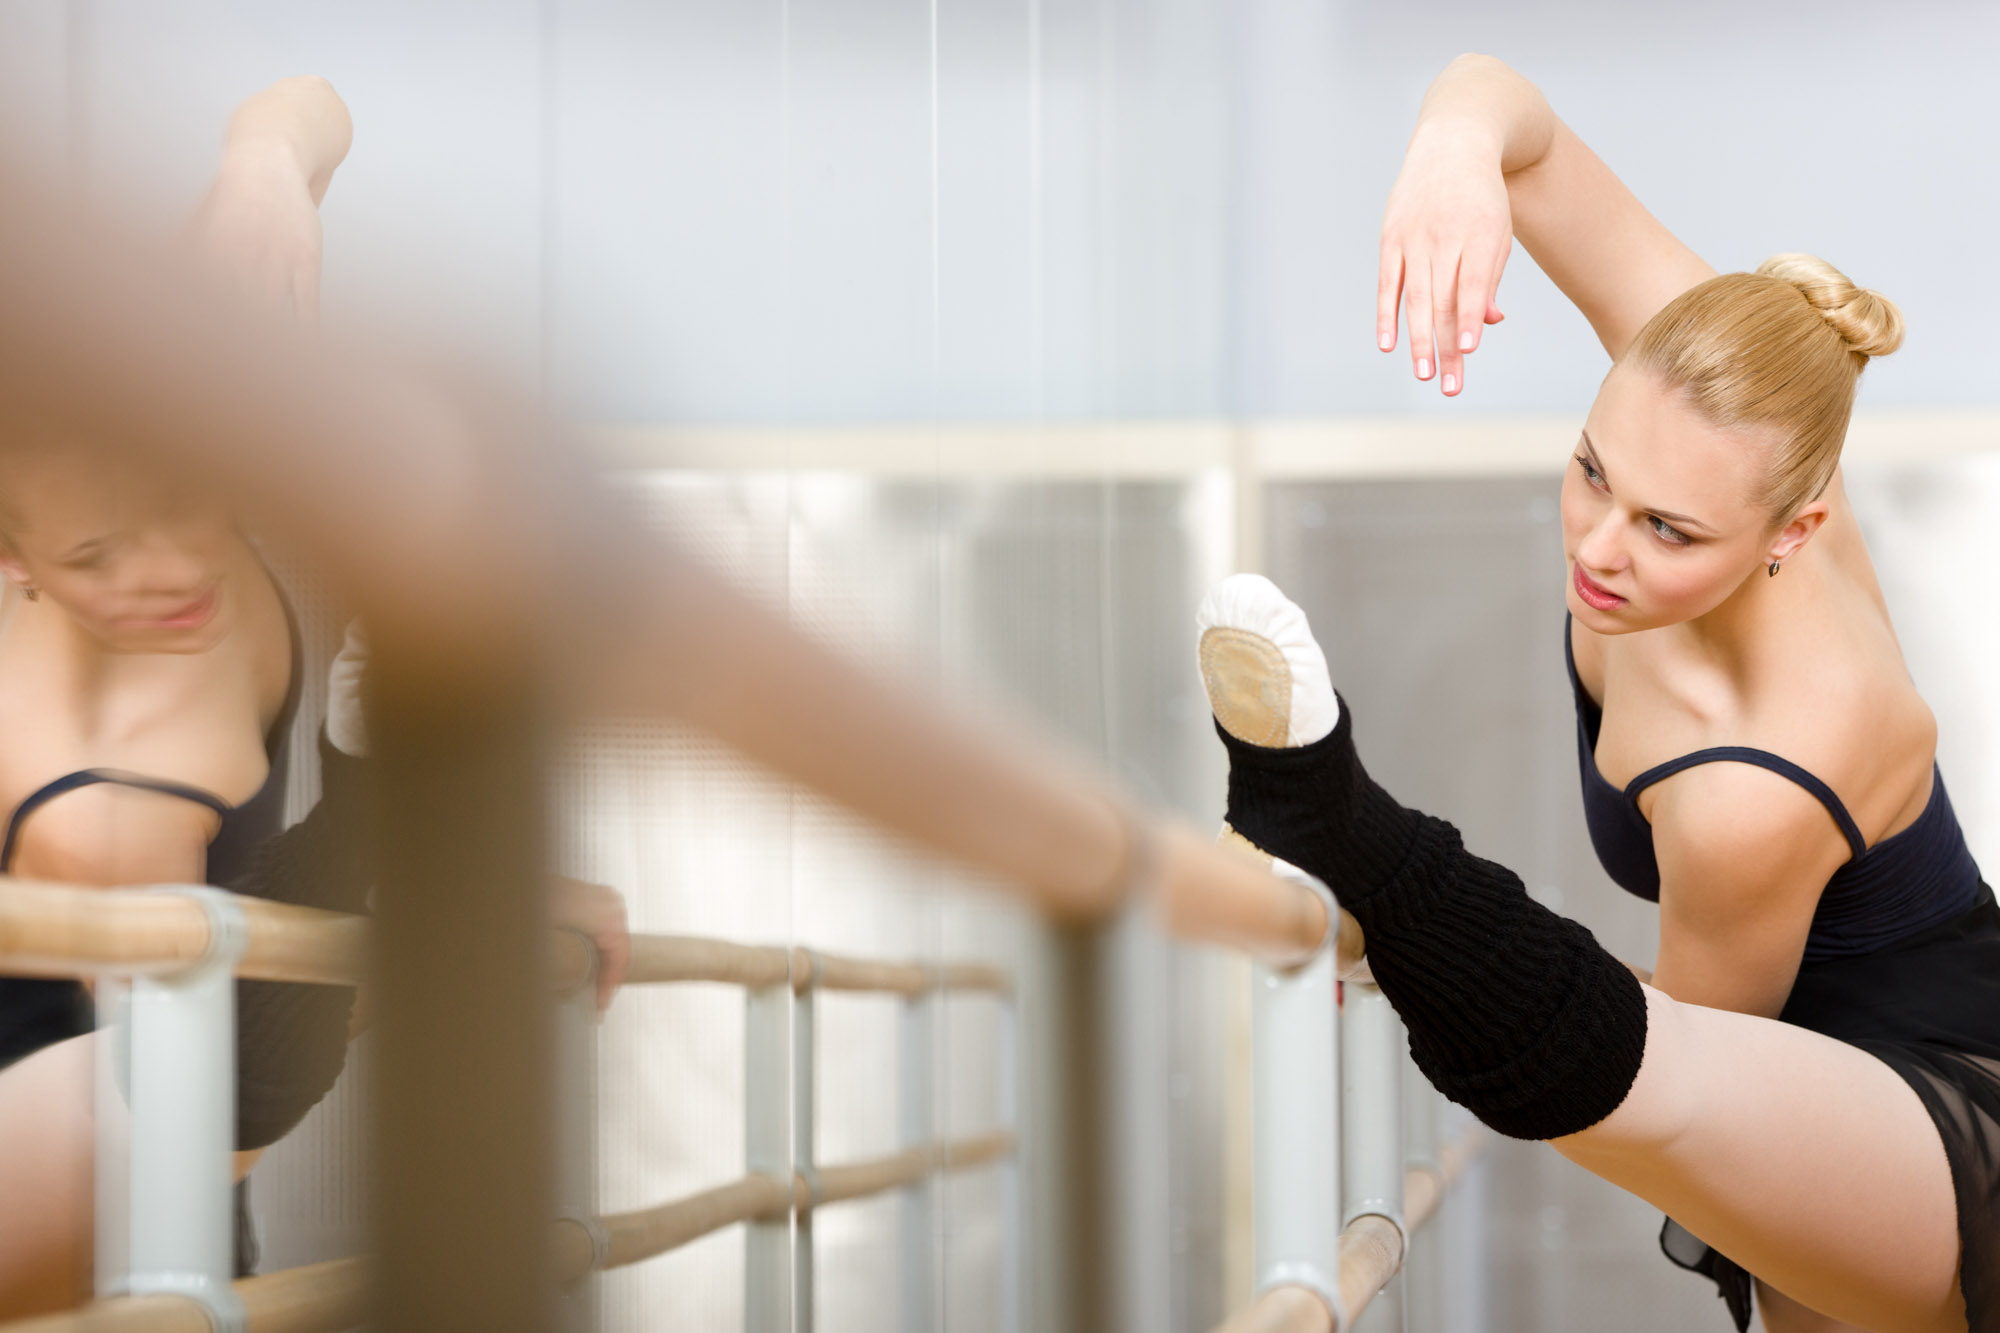
The “Ballet” exercise helps create a natural muscle corset and perfectly trains your back to stay straight.
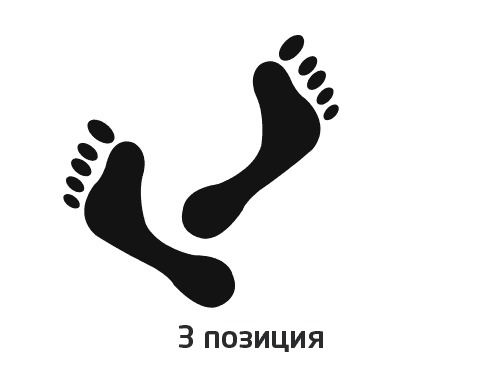
Initial position: holding onto a support (wall, table, chair), stand in the “first position”: heels together, toes turned out as much as possible, ideally 180 degrees. Like on a picture.
If the “first position” does not work, choose a lighter option: the feet are turned at an angle of 90 degrees, the heel of one rests on the middle of the other. Like this:
Performance: slightly twisting my tailbone towards myself, Tighten your legs and buttocks as much as possible. You will feel as if your lower body is pulling your upper body along with it, forcing you to roll your shoulders and straighten your back. Pull the top of your head up, your chin parallel to the floor and slightly pulled towards you. Stay in this position as long as you can, but not less than one minute. Like this:

Important: do not pull your chin forward too much, the neck remains straight (the back of the neck is extended). Make sure that the legs in the knee area remained closed, and the muscles of the legs and buttocks remained tense.
Result: when you relax the pose, you will feel that your back remains straight and your shoulders are turned. This more rigorous exercise can be performed in addition to (but not instead of) the String exercise if you feel that gentle stretching is not enough.
Advice: you can do this exercise casually, even standing at the stove and stirring onions in a frying pan. I do it in the bathroom - I hold the heated towel rail with my hand, while brushing my teeth with the other so as not to waste extra time. Just brushing your teeth takes one and a half to two minutes, this is enough to train your back.
Attention! For serious problems with the spine, the “String” and “Ballet” exercises may not be enough. Go to a good osteopath who can help you correct your posture. Any physical activity that corrects posture is also useful: dancing, yoga, Pilates, callanetics. In general, posture is everything to us, correct and maintain the correct position of your back and neck by any means!
Yulia Zartayskaya, your face culture instructor

For modern people, poor posture is a fairly common phenomenon. This is not surprising: the time we spend on computers or smartphones without paying attention to our posture affects the condition of our muscles and spine. One of the consequences of such negative changes is rounded shoulders.
When the back muscles are weakened, the pectoral muscles become overextended and pull the shoulders forward, resulting in what is known as slouched shoulders. Luckily, according to trainer Meg Plotsky, there are simple exercises you can do throughout the day to straighten hunched shoulders.
Slouched shoulders and poor posture: unpleasant consequences
In addition to the fact that poor posture looks unattractive, ignoring the correct body position while sitting and walking can cause a host of physical discomforts, which include:
- weakness and atrophy of certain muscles;
- constant headaches;
- fatigue due to impaired blood flow;
- back pain;
- pinched nerves;
- breathing disorders.
To prevent or eliminate the appearance of slouch in the shoulders, you need to learn how to relax overstrained muscles and strengthen weakened ones. To do this, try the exercises described below.
To prevent or eliminate the appearance of slouch in the shoulders, you need to learn how to relax overstrained muscles and strengthen weakened ones.
- Stretch with belt
Pick up a belt, jump rope, or similar object. Stand straight, take the belt in both hands and straighten them at shoulder height (palms facing down).
Spread your arms slightly wider than your shoulders and, while inhaling, lift the belt above your head. As you exhale, bend your arms so that your elbows are approximately at shoulder level, bringing your shoulder blades together.
The belt should be behind your head. Inhale and raise your arms straight up again; exhale and straighten your arms in front of you at shoulder level. Repeat 3-5 times.

- Hands behind your back
Stand or sit straight, lower your shoulder blades down. Place both hands behind your back and grab your right elbow with your left hand and your left elbow with your right.
If you can't grab your elbows, try grabbing your forearms or wrists. Lift your chest and lower your shoulder blades down, as if pressing them into your spine. Take 3-5 deep breaths, switch hands and repeat the exercise.

- Reduction of the shoulder blades
This movement helps strengthen the muscles that hold the shoulder blades in the correct position. Execution: Sit up straight and bring both shoulder blades together, as if trying to hold a pencil between them.
Hold your shoulder blades in this position for 10 seconds. Repeat 10 times. Try to do the exercise 3-4 times a day.

- Chest muscle massage
This procedure will relieve tension from the chest muscles. Execution: Take a tennis ball and place it between your shoulder and collarbone. Rest your body against the corner of the wall, gently pressing the ball into the wall, thus massaging the muscles.
If you find a painful point during the massage, continue to press on it (but not too hard) until the pain disappears.

- "Opening" of the chest
This exercise is good to perform in the morning or before bed to straighten your back, “open” your chest and relax your pectoral muscles.
Execution: Lie on your back with your feet on the floor and your knees bent. Stretch your arms out to the sides, palms up, so that your body resembles the letter T.
For maximum relaxation, place a rolled towel (along the length of the entire spine). If you are using a towel, make sure your buttocks and head are on the roll. Do this stretching for 10 minutes a day.

- "Angels" on the wall
This exercise helps strengthen the muscles responsible for maintaining proper shoulder position. Therefore, if you have hunched shoulders, perform this exercise several times a day: stand with your back pressed against the wall, arms extended to the sides.
Then bend your elbows and rotate them so that the back of your hand touches the wall directly above your elbows.
Slowly raise your hands up, place them behind your head, while trying not to lift the back of your hand and elbows from the wall. Slowly raise and lower your arms 10 times, as if you were drawing an angel in the snow.

Slouched (or rounded) shoulders are a fairly common type of posture disorder in our time, which is not only unaesthetic, but can also lead to pain. To avoid such troubles, the site recommends doing the simple exercises described above daily.
Most people fail to maintain correct posture for more than 15-20 minutes. And all because we initially make serious mistakes when we try to straighten our backs. Especially for the portal 103. by ballet dancer and teacher-choreographer of the School of Ballet “32 Fouettes” Inna Romanova revealed the secrets of how to maintain ballet posture without tension and torment during the day.
Rule #1: Keep your chin up

Ideal posture begins with correct head position. The simplest and healthiest thing you can do for your spine is to always keep your chin parallel to the floor and your head slightly back. In this position, your shoulders automatically straighten, your double chin disappears, and your body begins to wean itself off the “computer habit” of retracting your neck.
Rule No. 2: Feel the ground under your feet

If we sit on a chair, then our feet should always be firmly planted on the floor, resting on both feet. The height of the chair must correspond to your height - that is, approximately equal to the length of the lower leg. If the chair is low, you can put a thick pillow on it; if it is tall, you can place a stool under your feet.
Rule No. 3: Finding your footing

Stable support in the pelvic area is of great importance. When sitting, rest on your hips and ischial tuberosities (the two small bones at the bottom of your pelvis, just behind your hips), and you won't need the back of the chair at all.
Rule No. 4: Suck in your stomach

Imagine that you are being pulled up by the top of your head. Tighten your stomach, tuck your chin and lift your chest, straightening your shoulders. This will help you straighten your cervical spine and stretch upward, showing the world your beautiful long neck, which, by the way, everyone has. But remember that in this pose it is important to release excess tension, because maintaining correct posture should not require much effort.
Rule No. 5: Eliminate the letter zyu from your alphabet

Have you noticed how often you adopt a “twisted” position when watching TV, working on the computer, or worse, eating at the table? Avoid spiral positions, which can lead to scoliosis and other postural problems. In ballet, bends and twists are always done symmetrically in both directions.
Rule No. 6: Change positions

Change the position of your legs and hips every 15-20 minutes. A good way to relieve excess stress is to alternate bending your legs from time to time. This will strengthen your knees and hips, and the released energy will nourish your brain.
Prepared using materials from 32fuete.by, elle.ru
Just a few years ago, when body ballet had just appeared in Russia, even fitness trainers could not say what kind of sport it was and what relation it had to classical art. Today, fitness centers are increasingly including it in their schedules, and beginners are told that body ballet is something between fitness, ballet, yoga and aerobics.
Body ballet (“body ballet” or “body ballet”, as you like) came from the USA, it was invented by choreographer and fitness trainer Lia Sarago. In 2005, she first began teaching classes using the unique body ballet method, combining, based on her teaching experience, several effective, from her point of view, areas of training.
The complex included elements and techniques of Pilates (another American original method), yoga and classical ballet with barre work. The new set of exercises turned out to be so interesting and unusual that it is difficult to single out just one direction in it. Only one thing can be said for sure: this is a typically female form of fitness. Although, of course, there are no official prohibitions - in the United States, gender equality has always been strict.
The most important difference between body ballet and classical ballet is its accessibility for girls who do not have professional choreographic training behind them. You can also start doing it “from scratch” and at any age. Nevertheless, there is something from the performing arts in body ballet, in addition to exercises and the barre: if you are not attracted to standard stretching or Pilates classes, you can choose a new, unusual and graceful direction.
Who is body ballet suitable for? To all those women who want:
- lose weight
- tighten your body
- deal with posture
- keep yourself in good shape
- improve stretching and plasticity
- look feminine and graceful
Classes are held at a calm, smooth pace, gentle on the joints, back and heart, without any loads that require explosive strength. There are no contraindications here, except for general medical ones, for which only light stress on the body is recommended. You need to approach body ballet with caution if you have diseases of the cardiovascular system, with recent joint injuries and with varicose veins in severe stages.
What are the benefits of body ballet compared to other fitness activities?
1. You will definitely add beauty to your legs. If you don’t believe me, look at any ballerina. Special exercises work well all the muscles of the legs and make them slim. Over time, the “ears” on the hips will go away, “signature” ballet movements are effective for working out problem areas and combating fat deposits.
2. Posture in ballet is another distinctive feature by which dancers can be recognized from afar. Body ballet straightens the spine, straightens the shoulders, and teaches you to hold your head correctly and levelly. The big advantage of beautiful posture is not so much that you can see a special “bearing”; it rather speaks of a healthy back.
3. The body, core muscles, arms are strengthened, and the abdominal muscles are worked out. As a result, you achieve weight loss and muscle tone in those parts of the body that are considered difficult to work, and do not pump them up.
4. The same thing happens with the legs: a constantly elongated toe trains the elasticity of the muscle fibers, and not their transverse volume, so you won’t be able to “swing” in the legs. Men would be upset about this, but women are more interested in the elegance of their legs rather than the volume of muscles. Except for those who are preparing for a fitness bikini, of course.

5. Gracefulness, smoothness, “slowness” of movements, better coordination, sense of balance. You will learn truly feminine and sexy movements; regular body ballet classes will make them a habit.
6. General physical training and burning extra calories. Nobody says that body ballet is about self-admiration and graceful steps. This is the same type of fitness as many others, you will feel pleasantly tired after training, and many exercises are not as easy to do as it seems from the outside.
How are body ballet lessons taught?
On a gymnastics mat, at a special barre, or just standing on the floor. Exercises on mats are just a mixture of Pilates, yoga and special exercises from professional ballet for stretching, flexibility and strength. You will train all your limbs, corset, back, neck and stretch a lot.

The gymnastic barre is similar to a classic ballet barre: it is also made of “railings”, but is designed for those who have not previously performed on the stage of the Bolshoi Theater. This is where you will work on your posture. It is worth noting that the machine is not intended for throwing your leg over it or hanging on the railing - you will only use it to maintain your balance.
Believe me, following the trainer’s instructions, following every movement and maintaining posture is not so easy; it will require a lot of effort from the whole body. You will learn to place your feet correctly, turn out your feet, knees and hips, elegantly hold onto a support with your hand, and keep your back straight.

Exercises in a standing position are performed without support from a machine or wall; at this stage you will learn dance movements, jumps and spins. At the same time, you will continue to keep your shoulders back, your stomach and buttocks taut, your back straight, and your neck straight. Try walking around the house in this position, you will immediately understand how significant such a load is.
Don’t think that body ballet will help you quickly get rid of excess fat or train your endurance. For these purposes, there are other areas of fitness. Body ballet, first of all, is a very beautiful way to keep the body in good shape, correct shapes, correct posture, and improve gait.
Before your first lesson, be sure to check with your trainer what clothes and shoes will be most comfortable. As a rule, these are leggings, a T-shirt or a sports body made of synthetic materials. So that the instructor and you yourself can better see all your movements, try to choose tight-fitting clothes - this will allow you to control the correctness of the exercises.

Body ballet is often practiced in classic pointe shoes, ballet shoes or just Czech shoes. The main thing is that you yourself are comfortable, but remember that pulling on your toes in sneakers is not very comfortable.
If you already see yourself at the barre and are mentally preparing to do the splits, sign up for your first body ballet class - we’re sure you’ll love this sophisticated form of fitness.
A representative of the famous ballet dynasty, ballerina and actress Ilze Liepa is for many an example of elegance and excellent physical shape. Of course, her profession requires constant work on herself, but Ilze also “brings choreography to the masses” - she is the author of her own method of physical training. It is based on classical choreography and Pilates and is part of the studio program that Ilze Liepa opened for women who care about the perfection of their body. We offer a set of exercises from her new book.
I called the express set of exercises “12 steps to grace.” I force myself to do this mini-exercise when I want to take a break from my profession, but not lose shape and muscle tone.
I am confident in the effectiveness of these exercises. I would like them to become your start to the day, morning exercises that will give tone, vigor, correct and strengthen the muscles of problem areas.
This express complex in no way denies your other activities, whatever they may be. And this is also your “lifesaver” if you want to take care of yourself, but don’t know where to start.
For classes you will need:
- towel
- mirror
- free space
- wish
How to do the exercises correctly
- Breathing is an important element of any activity. It is advisable to inhale through the nose and exhale through the mouth. Please note that the exhalation corresponds to the most difficult moment of the exercise. (They often say: “Exhale with effort!”)
- When performing any exercise, try to reach up. The gaze is directed forward. The chin is perpendicular to the chest (maintain the natural curve of the neck). It will be great if you can keep your pelvis level. It’s great when the lower part of the body is in a mid-position and the abdominal muscles are neatly tucked. This position of the pelvis allows you to engage the deep abdominal muscles, which is necessary for a toned stomach and is safe for the back.
- It is very important to keep the chest open at the top (gently pulling the shoulders back) and the lower ribs closed (as if pulled together by an invisible corset).
- Dropped shoulders, shoulder blades pointing down and towards the center are also very relevant. (Imagine taking the scarf off your shoulders.)
- When performing any exercises, choose a range of motion that is comfortable for you.
The reference points of correct body position should be maintained in any position - standing, sitting, lying, on your knees. It will be great if you make it a habit to start each session by reminding yourself of the important technical points. At first it is very difficult to control your body. At this stage, a mirror can become your assistant. It will prompt and show all the inaccuracies.
Warm-up
1. Alpine step
Walking with a high hip lift.
I.p. - main stand.
- Raise your right leg, bent at the knee joint at a right angle, forward while simultaneously turning your torso to the right. Left hand forward, right hand back.
- Return to i.p.
- Change the position of your arms and legs.
Number of repetitions: up to 40 times (raising one leg - one repetition).
Important! The supporting leg is straightened. Shoulders slumped. The pelvis is stable, without amplitude swaying from side to side.


2. Shoulder circles
I.p. - basic stance on bent legs.
- Circular movements of the shoulders forward and backward.
Number of repetitions: up to 4 circles in each direction.
Important! Extension to the ceiling along the entire length of the spine. The ribs (lower anterior) are closed.

3. Raising arms to the sides
I.p. - basic stance on bent legs. Arms forward parallel to the floor. Palms towards the ceiling.
- Spread your arms to the sides. Inhale.
- Return to IP, turning your palms inward 270° (thumbs pointing toward the floor). Exhalation.
- Extend your arms to the sides, continuing to turn your palms towards the ceiling. Inhale.
- Return to i.p. Exhalation.
- Repeat pp. 1-4.
Number of repetitions: up to 4 cycles.
Important! Level position of the pelvis. Dropped shoulders. The anterior lower ribs are closed. The chest opens by moving your arms to the sides.


4. Relevé with hands
I.p. - basic stance on bent legs. Hands up in third position.
- Tilt the body to the right, maintaining the position of the hands.
- Return to starting position.
- Extend your arms to the sides with your head turned to the right.
- Execute paragraph 1-3 to the left.
Number of repetitions: 4 cycles.
Important! The pelvis without swaying to the right and left (tilting from the waist line). Shoulders slumped. When bending, the head is at an equal distance from the hands. The crown of the head stretches diagonally upward when tilted.

Set of exercises
1. Sphinx
Lunges: strengthen the front thigh, gluteal muscle. We stretch the front surface of the back standing leg.
I. p. - deep lunge forward with the right foot. The left foot is supported on the floor. The shin is perpendicular to the floor. Hands on the thigh of the right leg or supported on a chair. (Put a towel under your knee.)
- Straighten your left leg, lifting it from the knee and maintaining the depth of the lunge.
- I.p. - knee on the floor.
Number of repetitions: up to 8 times with each leg.
Important! Always keep the shin of the front leg perpendicular to the floor. The knee of the standing leg behind is directed to the floor. Shoulders slumped. Elbows bent. Keep your body upright and your lower abdomen tucked in.
When straightening the back leg, the depth of the lunge remains unchanged. The descent is smooth, with soft contact of the knee with the floor.
- Fix the position of a deep lunge on your right leg, with your left leg straight (behind).
Number of repetitions: hold the lunge position for 8 counts.
Note: if it is impossible to complete the exercise in full, complete the exercise at step 2 or reduce the number of repetitions. Perform the exercise in both directions.


Stretch
Stretch: the back of the thighs and popliteal area. There may be a feeling of stretching in the calf muscle.
I.p. - standing facing the back of a chair at arms length. The left leg is half bent. Right foot - forward on the heel.
- Bend forward.
Important! The back is extended. Breathing is free.
Note: Perform the exercise on both legs.

2. Plie in the second wide position
We strengthen: inner thigh, front thigh, buttocks, lower legs. We stretch: the inner surface of the thighs and improve the mobility of the hip joints.
I.p. - standing facing the chair. Legs apart, feet turned outward. Hands on the back of the chair.
- Deep plie in second position.
Number of repetitions: 8 times.
Important! Knees on plie above feet. The body is vertical. Shoulders slumped. The ribs are closed. Slow pace.

- Freeze in the deepest plie position.
- Raise your right heel.
- Lower your right heel.
- Raise your left heel.
- Lower your left heel.
Number of repetitions: 8 times, alternately lifting each heel.
Important! The amplitude of the plie is unchanged. Feet firmly on the floor.

- Raising both heels at the same time.
Number of repetitions: 8 times.
- Raise both heels and freeze in the deepest position or spring down.
Number of repetitions: 8 times.
Important! Emphasis on downward movements.
Note: if it is impossible to complete the exercise in full, complete the exercise at step 8 or reduce the number of repetitions.

Stretch
Stretch the front surface of the thighs.
I.p. - standing facing the back of the chair on your left half-bent leg. The right leg is bent back and supported by the right hand, the heel is close to the buttock. Knee pressed to knee. Left hand on the back of the chair.
- Fix the position of the right hip.
Number of repetitions: hold the position for 10 seconds.
Important! The lower abdomen is tightened. The ribs are closed.

3. Closed attitude to the side
We strengthen: buttocks, outer thighs and hip joints. We improve the range of motion in the hip joints.
I. p. - standing facing the back of the chair. The supporting leg is half-bent, the working leg is half-bent and raised to the side, knee forward, toe toward you.
- Raise your right leg to the side 30-40 cm from the floor.
Number of repetitions: 8 times
- Straighten your leg to the side, maintaining the position of your foot.
Number of repetitions: 8 times
Important! The lower abdomen is tightened. The ribs are closed. The knee of the working leg is directed forward, and the heel is directed back.
Note: perform the exercise in both directions.


Stretch
Stretching: back muscles, intercostal muscles.
I.p. - standing on your right leg. The left leg is pointed back to the right.
- Extend your left arm to the right above your head. Right hand in front of you.
- Lock the tilt position.
Important! The ribs are closed. The body remains tilted to the side. The upper hand is extended diagonally upward through the little finger.
Note: perform the exercise in both directions.


4. Heron
Taking the leg back and to the side. We strengthen: buttocks, back of the thighs. Stretch: the back surface of the supporting leg.
I.p. - standing on a half-bent left leg, leaning with straight arms on the back of the chair. Right leg back. I'll stop at myself.
- Raise your right leg up.
- Lower your leg 5-10 cm.
Number of repetitions: 8 times.
Important! The body and leg form a single line in i. n. Shoulders dropped. The lower abdomen is tightened. The ribs are closed. The heel is directed to the ceiling, the knee is directed to the floor.
- Bend your right leg at an angle of 90°.
- Raise your right leg.
- Lower it by 5-10 cm.
Number of repetitions: 8 times.
Important! Shoulders slumped. The lower abdomen is tightened. The ribs are closed. The heel is directed to the ceiling, the knee is directed to the floor.
- Rotate your right knee to the right.
- Return the knee to the center.
Number of repetitions: 8 times.
Note: Perform the exercise on both legs. If it is impossible to complete the exercise in full, complete the exercise at step 5 or reduce the number of repetitions.


Stretch
Stretching the buttocks and outer thighs. Stretch: buttocks, outer thighs and hip joints.
I.p. - standing on a half-bent left leg. The right leg is bent, the foot is on the left thigh. The knee of the right leg is moved to the side. Hands on the back of the chair.
- Bend forward while bending your supporting leg.
- Lock the tilt position.
Number of repetitions: hold the incline position for 10 seconds.
Important! The knee of the right leg tends to the floor. The body is elongated.
Note: perform the exercise in both directions.

5. Swaying Birch
We strengthen: the front surface of the thighs, knee joints and deep abdominal muscles. Stretch: the front surface of the thighs.
I.p. - on my knees. Feet hip-width apart. Hands behind your head. (Put a towel under your knees. It will be more comfortable.)
- Tilt your straight body back.